



How to Fill Shallow Damage in Wood
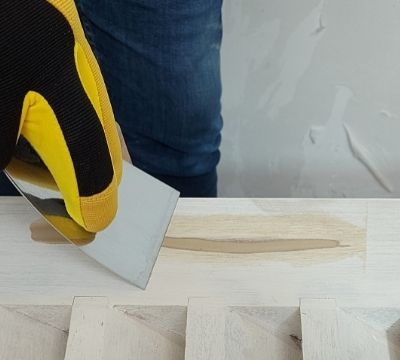
Shallow surface damage on interior woodwork is one of the most common making-good jobs before decoration. Nail holes in skirting, teeth in architrave, fine cracks in door frames, and gaps along joints that have opened up over time are rarely serious, but they will show through paint. A wood filler handles these repairs quickly, filling and finishing in one step. Here's how to achieve a clean, paint-ready surface.
What Counts as Shallow Damage?
Shallow damage is anything that sits at or near the surface of the timber. This includes nail and pin holes from fixings, small teeth and dings from impact or wear, fine cracks and splits along the grain, open joints where two pieces of timber meet, minor imperfections from previous repairs where filler has cracked, and surface marks left by scrapers or tools during strip-back. If the damage does not extend deep into the timber and the surrounding wood is firm and sound, a wood filler is all you need. For deeper damage where material needs rebuilding, see our guide on shaping and reforming woodwork.
Step 1: Prep - Clean and Stabilise If Needed
Start by cleaning the area around the damage. Scrape away any loose paint, flaking material, or raised edges with a filling knife or scraper. For fine cracks, run your knife along the line to clear out dust and loose fibres so the filler can penetrate the crack rather than bridge over it.
On previously painted woodwork, make sure the surrounding paint is well bonded. If the paint is lifting or flaking around the repair, scrape it back to where it is firmly attached. Filler applied to loose paint will fail.
If the timber around the damage feels soft, spongy, or shows signs of early decay, apply Wood Hardener to stabilise the surface before filling. Apply it directly to the affected timber using the brush supplied in the screw-top lid. Work it liberally into the wood, paying particular attention to end grain and any areas where the timber is soft or rotten. It can be applied to dry or damp wood, but not soggy wood. On sound, firm timber with no signs of softening, you can fill directly without a hardener.
Step 2: Fill and Finish
For shallow damage, the fill and finish happen in one step. Wood Filler is a fine-textured filler designed for surface-level repairs on woodwork. It is available in two colours: off-white and natural wood.
For nail holes and small dents, press a small amount of filler firmly into the void with your filling knife and scrape the excess off flush with the surrounding timber. One pass is usually enough.
For fine cracks, work the filler into the crack line with firm pressure, drawing the knife along the length of the crack in one direction. Feather the edges out either side to blend the repair into the surrounding surface.
For open joints, press the filler firmly into the gap, making sure it reaches the full depth. Scrape flush and clean up any excess on the surrounding timber.
For larger areas of surface damage or imperfections from previous repairs, apply a thin skim of filler across the affected area to create a smooth, uniform surface. Work in long, even strokes and feather the edges where the filled area meets the sound timber.
Allow to dry fully, then sand with fine-grit sandpaper (P180 or higher).
If there are any remaining low spots or imperfections, apply a second thin coat and sand again. The surface is now ready for priming and painting. Once decorated, these repairs will be invisible.