



How to Smooth Rough and Textured Walls
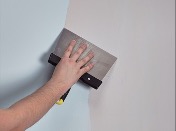
Rough and textured walls ruin a good paint job. It does not matter how good the paint is - if the surface underneath is uneven, the finish will show it. Roller marks sit differently, light catches every bump, and the result never looks right. Here is how to take a rough or textured wall back to a smooth, flat surface ready for paint.
What types of rough and textured surfaces can you smooth?
This works on interior walls and ceilings where the surface is sound but uneven. Rough plaster, stippled or sponge-effect finishes, repaired patches, old blown or patchy plaster - anything where the texture is getting in the way of a clean finish.
If the texture is deeper than 5mm in places, knock down the high points with a scraper or broad knife first. Renovation Skimcoat can be applied up to 5mm thick, so the flatter you get it now, the less product you use and the better the result.
For Artex ceilings, see our dedicated guide on how to cover Artex using filler . Older Artex may contain asbestos. Always get it tested by a professional before you touch it.
Step 1: Prep - Prepare and Stabilise the Surface
Scrape off anything loose, flaking, or poorly bonded. Run a broad knife or scraper across the wall and remove anything that is not firmly attached. It does not need to be smooth yet - you are just getting rid of anything that will stop the skimcoat bonding properly.
Brush away all dust and debris. The surface needs to be clean, dry, and sound.
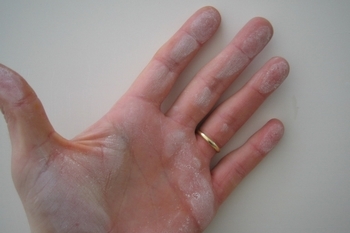
Check whether the substrate needs stabilising. Rub your hand or a dark cloth across the area. If it comes away dusty or powdery, or the surface crumbles under light pressure, it needs treatment. Apply Wall Hardener to consolidate the surface and give the skimcoat something solid to grip.
Apply liberally with a brush or roller, working it into the dips and undulations where the surface is most porous. Give it a minimum of 24 hours to dry before you start skimming.
Step 2: Apply the First Coat
Renovation Skimcoat is a ready-mixed skimcoat that can go up to 5mm thick. It has no working time limit and levels out as it dries, so you can work at your own pace without the product going off on you.
Using a wide taping knife, trowel, or roller, apply the first coat across the wall in long, even strokes. This coat is about filling the texture. Work the product into the dips and low points. Do not try to get it perfect on this pass. Just get it on, get it bonded, and level it roughly.
If you are using a roller, load it from a tray or straight from the tub. Pre-wet the roller and remove any loose lint so it picks up the product properly. Roll on a generous amount and then blade it off while still wet, using long, steady strokes. For a full walkthrough on roller application, see our advice blog.
Work in sections and keep a wet edge to avoid visible joins between passes. Do not go back over the same area too many times - overworking it creates ridges. Put it on, level it, move on.

Step 3: Sand
Let the first coat dry completely. That is 12 hours minimum, sometimes longer depending on how thick you went and the temperature and humidity in the room. Do not rush it. Sanding or recoating too early causes dragging, uneven patches, or bubbles.
Once fully dry, lightly sand with fine-grit sandpaper (P180). A sanding pole is worth using on larger walls - it gives you more consistent pressure and a more even result than sanding by hand.
Step 4: Apply the Second Coat
Apply a second, thinner coat across the whole wall. This is the one that matters. The texture is already filled - now you are building the final surface that paint will sit on.
Work in sections and feather out the edges as you go. Apply slightly more pressure to one side of the knife to blend each pass into the last. The smoother you get this coat, the less sanding you need and the better the paint will look.
Take your time. On a premium decoration job, this coat is what separates a good result from a great one. Every ridge, trowel mark, or undulation left now will show through paint, especially in strong or directional light.
Step 5: Final Sand and Finish
Let the second coat dry fully. Do a final light sand with fine-grit sandpaper (P240) to remove any lines or marks. Dust off the whole surface with a brush or clean cloth.
Run your hand across it. If you can feel any bumps, ridges, or rough patches, sort them now with a thin spot application and one more sand. Much easier to fix at this stage than after the first coat of paint goes on.
The surface is ready for painting. Renovation Skimcoat will not flash or grin through paint, so there is no need to spot prime. You are painting onto a smooth, consistent base - the right foundation for a premium finish.