



How to Joint Plasterboard Using Scrim Tape
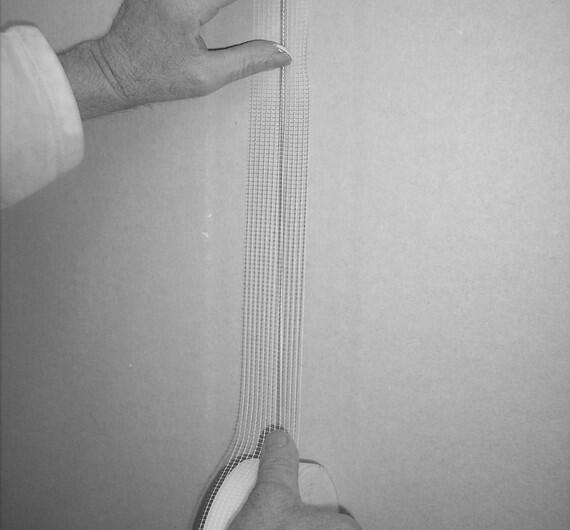
Self-adhesive plasterboard scrim tape is a fast, straightforward method for taping plasterboard joints. It sticks directly to the board with no bed coat needed, which saves a step and speeds up the process. Here's how to tape, fill, and finish plasterboard joints using the scrim tape method.
Why use scrim tape?
Self-adhesive scrim tape is a fiberglass mesh tape that sticks directly to the plasterboard surface. Because it is self-adhesive, there is no need to apply a wet bed coat first - you simply stick the tape over the joint and fill straight over the top. This makes it quicker and easier to apply than paper tape, especially on longer runs or larger areas.
The open mesh structure of scrim tape allows the filler to pass through and bond to the board on both sides of the joint, creating a strong adhesion. It also means there is no risk of air bubbles or dry spots under the tape, which can be an issue with paper tape if the bed coat is not applied correctly.
Scrim tape is slightly thicker than paper tape, so the finished joint will have a fractionally higher build. In practice, with good feathering and finishing, this difference is negligible.
Step 1: Tape - Apply the Scrim
Start by checking the plasterboard joints. The boards should be tightly butted together with no gaps wider than 2-3mm. If there are larger gaps, fill them first and allow to set before taping.
Peel the scrim tape from the roll and press it firmly over the joint, centring it along the full length. Run your filling knife or the flat of your hand along the tape to press it flat against the board and ensure full adhesion. There should be no wrinkles, bubbles, or lifting edges.
Cut the tape cleanly at the end of each joint. Where joints meet, butt the tape ends together rather than overlapping. Overlapping creates a raised area that is harder to fill flat. Scrim tape is ready to fill over immediately - there is no waiting for a bed coat to set.
Step 2: Fill - Fill Over the Scrim
Using a taping knife, apply your chosen filler over the scrim tape, pressing firmly to work the filler through the mesh and into the joint behind it. The filler should fully cover the tape with no mesh visible through the surface.
Apply the filler slightly wider than the tape on each side and feather the edges outward to create a gentle taper into the surrounding board. Use a broad knife - 150mm or 200mm - to get a smooth, even application.
The taper is what makes the joint invisible. If it is too narrow, the joint will show as a raised line. If it is too steep, the transition will catch the light and show as a shadow. The wider and more gradual the taper, the better the joint disappears.
Allow the fill coat to set fully before moving on to the finish stage. Do not sand or apply the finish coat until the filler has completely hardened.
Step 3: Finish - Skim to a Smooth Surface
Once set, lightly sand the fill coat with fine-grit sandpaper (P180) to remove any ridges or high spots.
Apply a final thin coat of your chosen finish product over the joint, feathering it out well beyond the fill coat on each side. Use a broad knife and work in long, even strokes. The wider you feather, the more invisible the joint becomes.
Allow to dry completely, then lightly sand with fine-grit sandpaper. The joint is now ready for decoration.
Read our step-by-step guide on using paper tape to joint plasterboard joints
Our full range of Plasterboard Finishing Solutions