How to Smooth New Plasterboard with Spray Plaster

Spray plaster is the fastest way to finish new plasterboard on larger jobs. Once plasterboard is installed, taped, and jointed, the surface is generally ready for painting. Though for a higher level of finish, there's an extra step in the process.
Instead of smoothing every wall and ceiling by hand with a trowel, you spray the plaster onto the surface using an airless machine and blade it off smooth. On large projects such as whole house renovations, commercial properties or new-build developments, it saves hours compared to hand application.
When does spray make sense over hand finishing?
Spray plaster is about scale. Setting up a machine, loading the product, and cleaning down afterwards takes time. We have a single small room, hand finishing is probably quicker. On anything bigger - multiple rooms, long wall runs, large ceiling areas - spraying is significantly faster. It goes on evenly, covers ground fast, and blades off to a smooth, consistent finish.
Step 1: Prep – check the surface
Before you spray, all joints need to be taped, filled, and sanded. Screw heads should be filled and flush. Run a broad knife across the surface to check for ridges or high spots at the joints. Fix any issues now - spray plaster will not hide these defects.
Dust the surface down. The board should be clean and dry. There is no need to prime or seal the surface before spraying.
Mask off anything you do not want plaster on. Spray plaster produces overspray, so cover floors, windows, door frames, and any finished surfaces.
Step 2: Spray the first coat
Prime the machine with water first, then load your chosen spray plaster into the machine's bucket or hopper. Remove the gun filters to allow the product to flow. Refer to the product packaging for the recommended nozzle size.
Refer to the manufacturer's instructions for setting up the spray machine.
Application tools: any type of airless spray machine with a minimum flow rate of 5L/min. For optimum use, we recommend the following nozzles: 5.31, 5.35, 6.31 or 6.35.
Once the machine is prepared and ready to use, prime it with the product.
Stand square to the wall, 0.7 to 1 meter back. Keep the gun at 90 degrees to the surface and work about a square meter at a time, moving parallel to the wall at a steady speed.
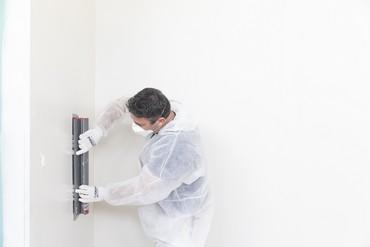
After spraying, skim the surface with a broad blade - at least 500mm wide. That levels the plaster out. Work in long, even strokes.
If spraying both walls and ceilings, do the ceilings first.

Step 3: Spray the second coat
Let the first coat dry fully. You can recoat as soon as the surface is hard and dry to the touch. Lightly sand between coats to knock down any ridges or high spots.
Spray a second, thinner coat across the whole surface. This is the finish coat - it levels everything out and gives you the smooth, uniform surface that paint will sit on. Blade off with long, controlled strokes. Take your time with this coat. Every trowel mark or ridge left now will show through paint.
Step 4: Final sand
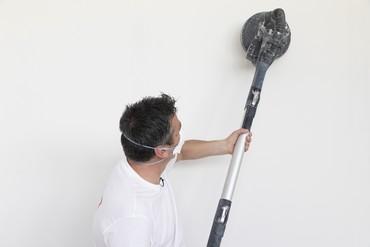
Let the second coat dry fully - 24 to 48 hours depending on the thickness and conditions in the room. Once completely dry, lightly sand the entire surface with fine-grit sandpaper.
Dust off the entire surface. The plasterboard is now fully finished and ready for painting, wallpapering, or decorating. No priming or sealing is needed.